10. Exporting for your doctor
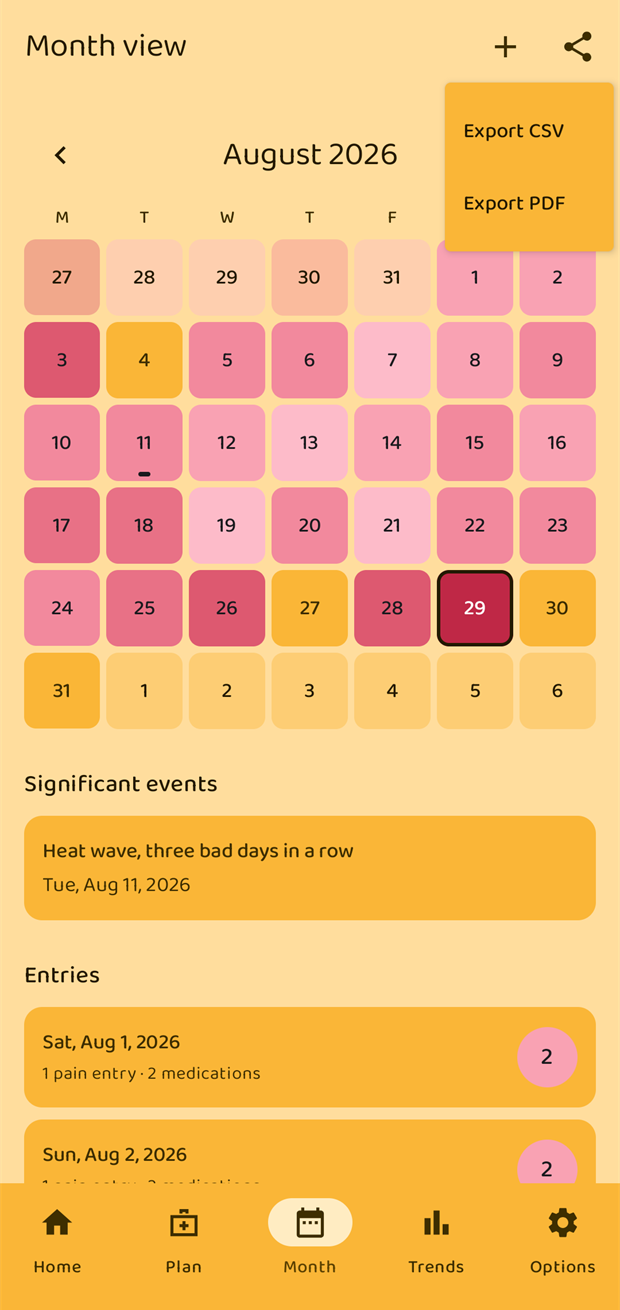
Exports live in the Month tab, behind the share icon in the top bar.
Choosing a range
Both formats then ask how much to include, counting back from the month you are looking at:
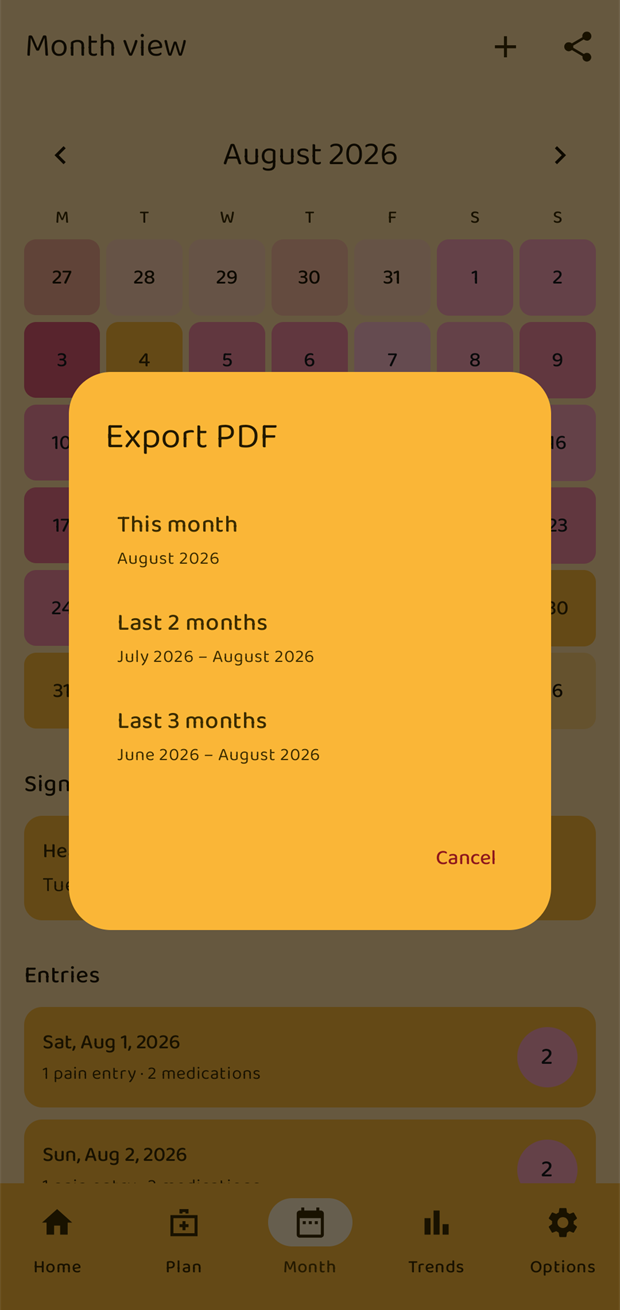
- This month
- Last 2 months
- Last 3 months
The dialog names the actual months so there is no guessing.
Sharing the file
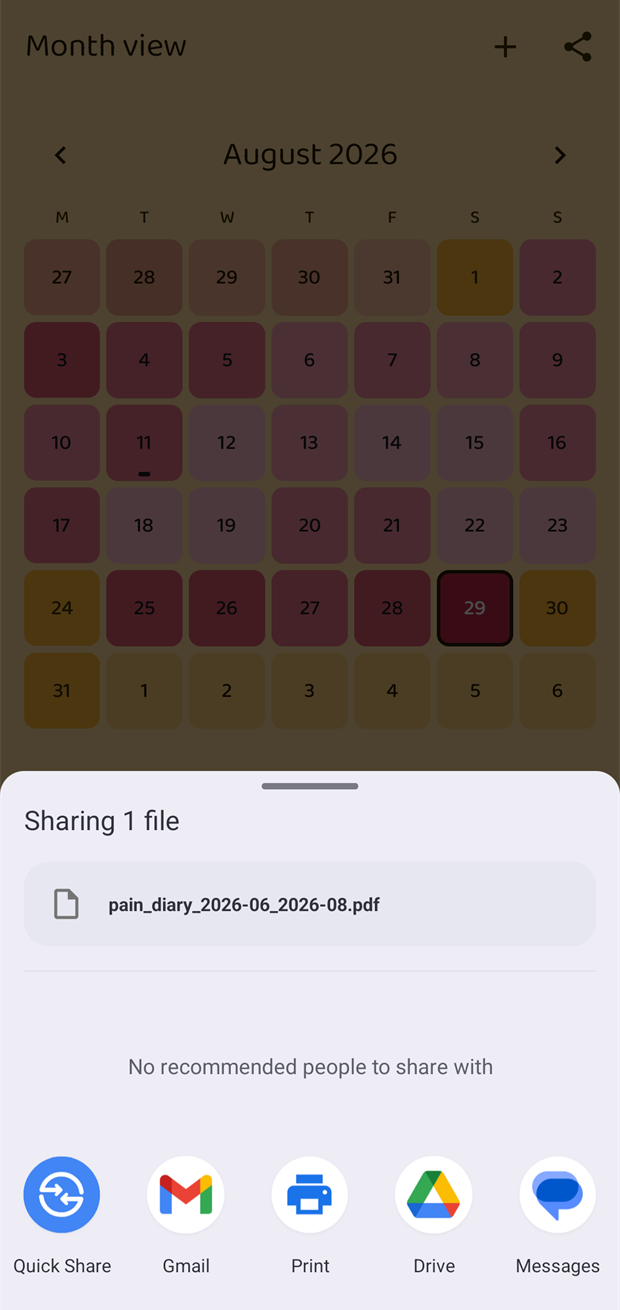
The file is generated and handed to Android's normal share sheet, so you can email it, print it, save it to Drive or Files, or send it however you like. Nothing is uploaded by the app itself — what happens to the file next is entirely your choice.
PDF: the two layouts
Which layout is used is set once, under Options → Export → PDF layout, and applies to every PDF export.
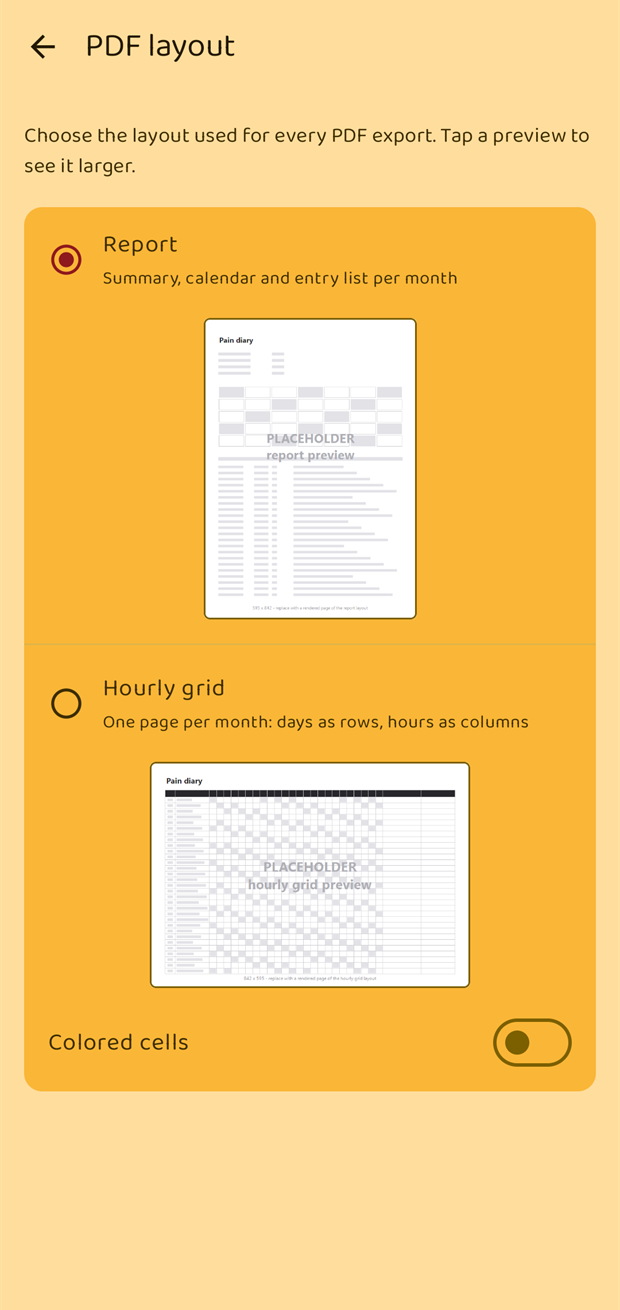
Report
Summary, calendar and entry list, one section per month.
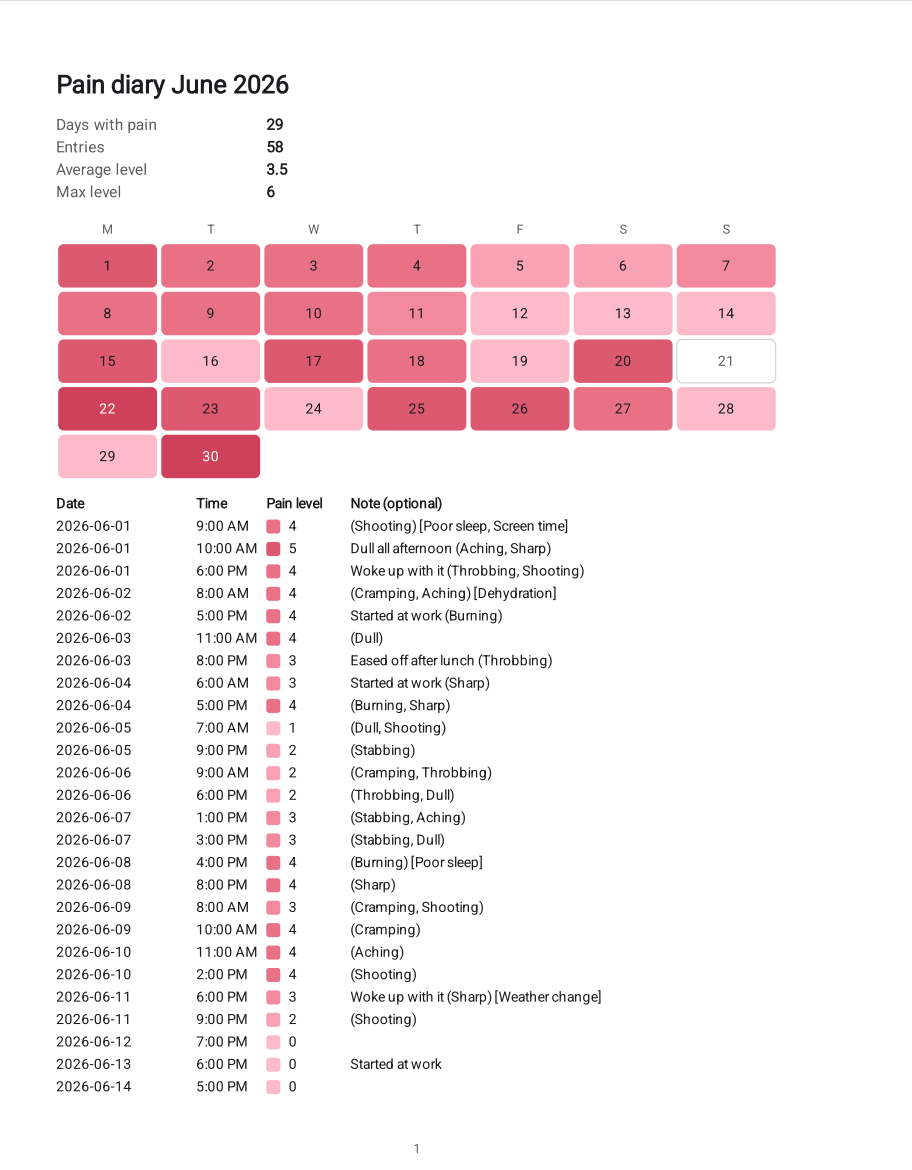
Each month gets a header with the four summary numbers, a colour calendar of the month, and then every entry in order: date, time, a colour swatch with the level, and the note. Qualities are printed in round brackets after the note, triggers in square brackets.
This is the layout to choose if your doctor wants to read the story.
Hourly grid
One page per month: days as rows, hours as columns.
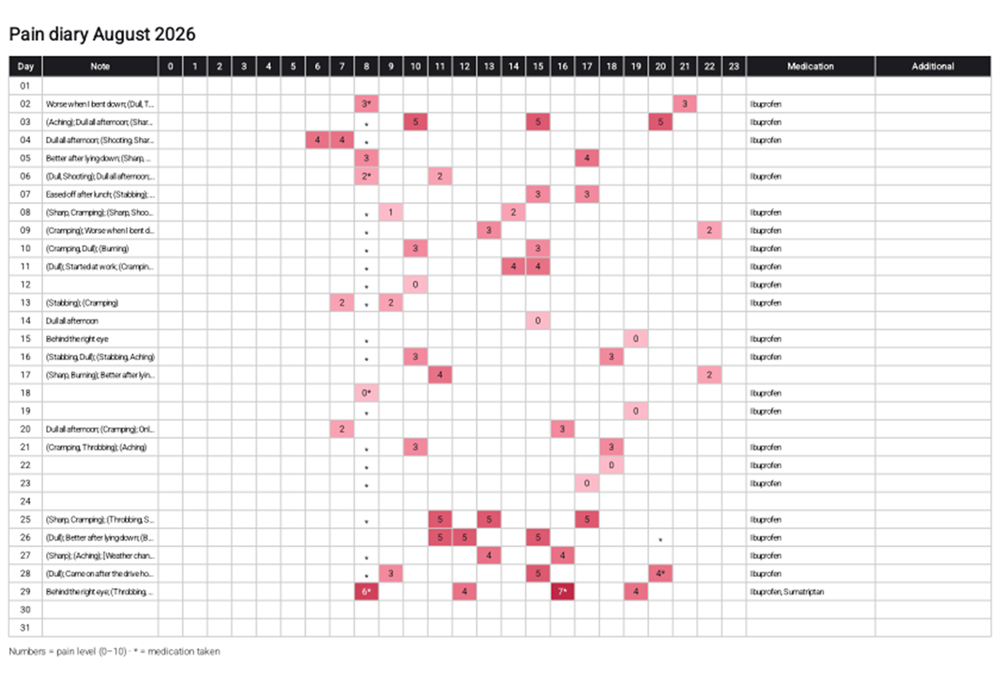
Each row is a day of the month, each column an hour from 00 to 23, and the number in a cell is the pain level at that hour. An asterisk marks an hour with a medication intake. The Medication column on the right names what was taken that day, and Additional is left blank for handwritten notes.
This is the layout to choose if your doctor wants to see the shape of a month at a glance.
Colored cells (on the same screen) fills each cell with the pain colour. Switch it off to print the grid in black and white — the numbers alone still carry the information.
What gets printed
Two settings under Options → Export affect the content of both formats:
| Setting | Effect |
|---|---|
| Include triggers in export | On by default. Your triggers are printed in the note column. Turn it off to keep them private. |
| Export language | Headings, month names and the built-in pain types are written in this language. Your own notes, triggers and medication names are always printed exactly as you typed them. |
Export language is separate from the app's language, so you can read the app in Turkish and hand your doctor a German report.
Individual medications can also be left out: switch off Include in reports in a medication's settings and its intakes stop appearing in PDFs (and stop being marked on the trends chart), while still being recorded in the app.
CSV
Export CSV produces a spreadsheet file with the same range choice. It has one row per record and these columns:
type, date, time, pain_level, medication, note, qualities, triggers
type is pain, intake or trigger. Rows are in time order across the whole range. The file is written as UTF-8 with a byte-order mark, so Excel opens it with accents and non-Latin characters intact.
Use CSV if you or your doctor want to do your own analysis; use PDF if you want something to hand over or pin up.